To create a Mobile service we need a Windows Azure subscription. Please visit to http://azure.microsoft.com/en-us/ and create a free trial subscription.
Step 1: Open the Windows Azure Portal using http://manage.windowsazure.com. Log in with your subscription credentials. On the portal, select Mobile Services. In the lower left section of the portal, select New and create Mobile Service with the following option:

On clicking on Create, the following window will be displayed where we need to enter some information about the Mobile Service:

The options for database in the Dropdown are Create a new SQL instance and use the Existing Database. TheBACKEND dropdown has the following options for runtime:
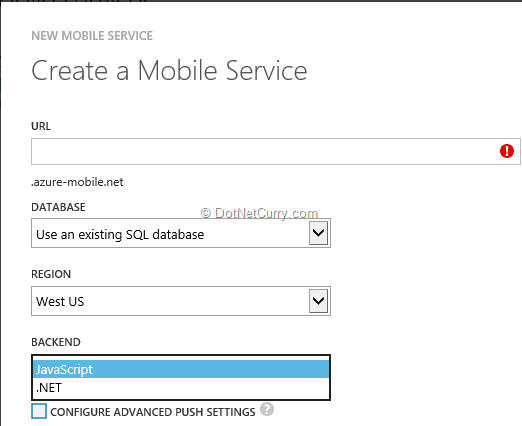
These options generate APIs for performing operation on the backend table data. After entering Mobile Service details, click on the Next arrow and specify the Database Settings as shown in the following figure:
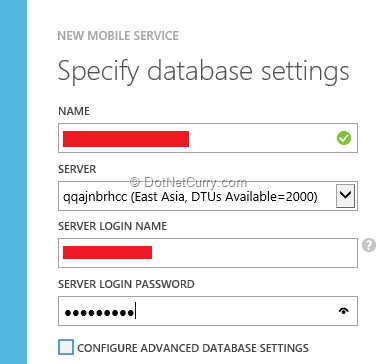
After entering the necessary information, click on the OK (tick sign) and the Mobile Service will be created as shown in the following figure:

Step 2: Once the Mobile service is created, click on it and the following page will get displayed:
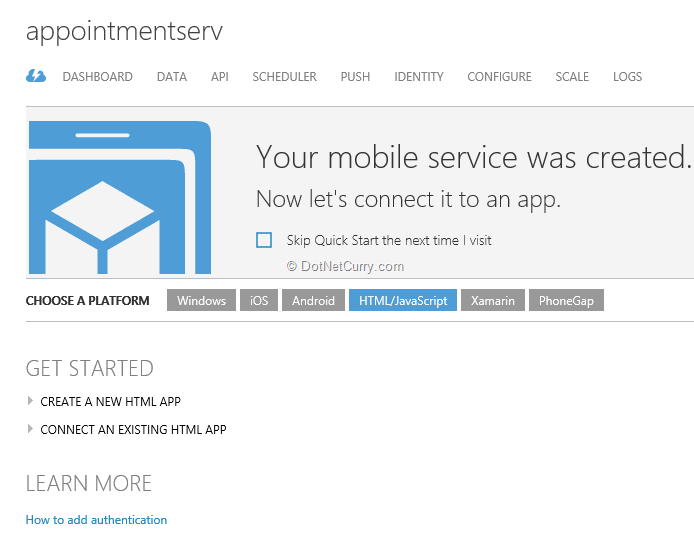
This page provides information about the platform for consuming the Mobile service. We have options like Windows, iOS, Android, HTML/JavaScript, etc. The portal provides a ready App for guiding us through the use of Mobile Services. On the top of the page, we have options to create DATA Store Table, Scheduler, PUSH configuration, the Host configuration, etc.
Step 3: To create a Data Table, click on DATA. This will show the Page which contains List of tables for the Mobile Service. Click on Create at the bottom of the page and the Create New Table window will be displayed. In this window, Enter Table information as shown in the following figure:
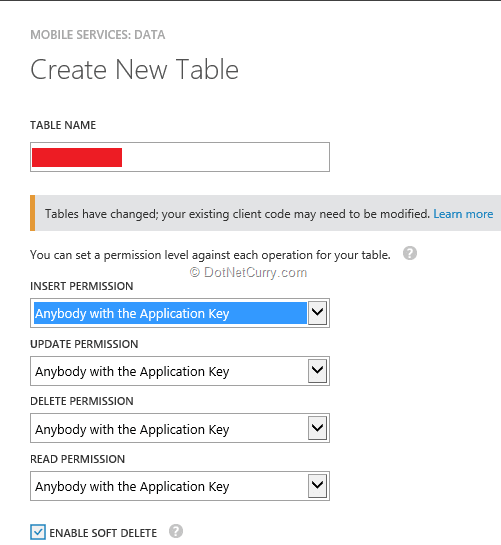
Create an Appointments table. Here we need to define permissions for performing CRUD operations on the table.
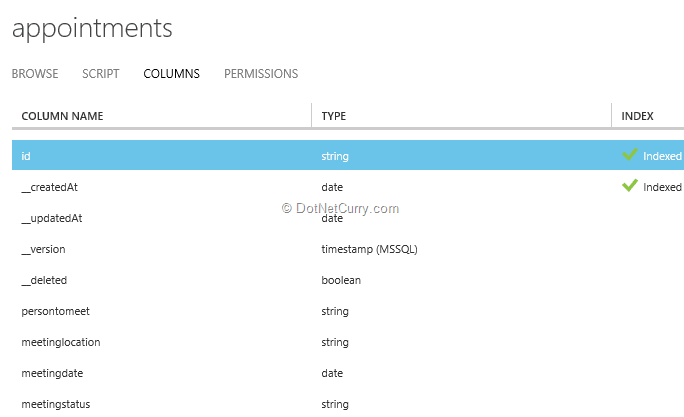
Step 4: Once the table is created, click on the table name. A new page will be displayed with options such as BROWSE, SCRIPT COLUMNS and PERMISSIONS. Click on the COLUMNS option to view the default columns of the table as shown in the following figure:

To add new columns, click on the Add Column link at the bottom of the page. The Add Column dialog gets displayed:
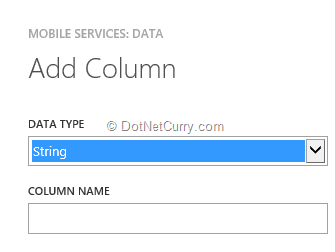
For the table, create the following columns:
- Persontomeet
- Meetinglocation
- Meetingdate
- Meetingstatus
- Createdby
- Description
The final definition of the table will be as follows:
Creating ASP.NET MVC Client Application for Windows Azure Mobile Services
In this section, we will develop an ASP.NET MVC 5 client for consuming Mobile Service. This client will make use of the Mobile Service URL and the associated key to perform Operations with Mobile Service.
Step 1: Open Visual Studio 2013 and create a new ASP.NET MVC application. Make sure that you select the MVC project which will provide ready controllers for Account, used for Authentication.
Step 2: In the controller’s folder, add a new AppointmentsController with the Index method implemented as follows:
The Index Action method is applied with the [Authorize] filter, this means that the end-user must log-In before accessing Appoint Index View.
Step 3: Run the application and create two users for the application using Register View under AccountsController. The current application uses ‘user1@user.com’ and ‘user2@user.com’.
Step 4: In this MVC project using NuGet package manager add references to the latest jQuery, knockout library and bootstrap 3.3.2 library.
Step 5: Scaffold an empty Index view form the Index action method of the AppointmentsController.
Step 6: In the Index.cshtml, add the following code:
The above code performs the following operations:
- The knockout ViewModel, appointmentVM creates a client object of the Mobile service based on the URL and the access key associated with it.
- The, <script src="http://ajax.aspnetcdn.com/ajax/mobileservices/MobileServices.Web-1.2.5.min.js"></script> provides access to the MobileServiceClient object. Using getTable() function of this object, we can access references of the Mobile Service Table; in our case Appointment.
- The code defines observables for data-binding with the HTML UI. Using these observables, we can access data entered by the end-user.
- The save() function contains code for inserting the appointment data entered by the end-user. This function calls insert() function of the MobileServiceClient to insert data in the table.
- The getMeetings() function queries the Table and receives data for a current login user.
Run the application, Login with the credentials (user1@user.com) and the following page will get displayed.
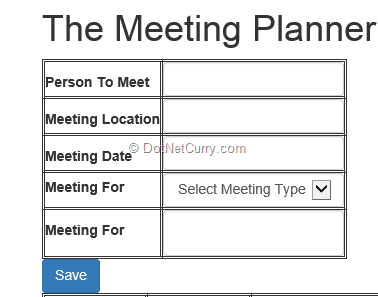
Enter Appointment details. After clicking the Save button, you should see the following appointment details:
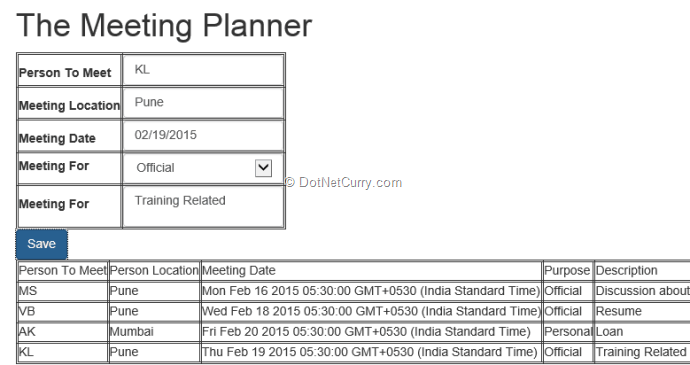
The Table in the above figure displays only appoints saved by the current logged in user.
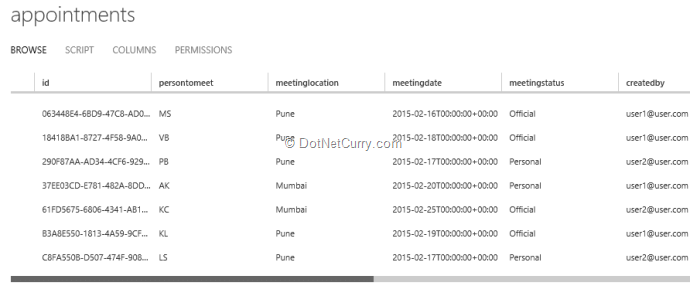
The inserted data can be viewed in the portal for the Appointments table:
This is the MVC client application, in short a web application used by the end-user to save his appointments information using Mobile Services on the cloud. The advantages of this approach are the same. The end-user can access his appointments information from any device having the client-application on it, and by consuming the same mobile service. Mobile services provide client-libraries to build application on any client-device.
Deploying the MVC Client Application
The Mobile service by default is accessible to the localhost, but what if we want to deploy the current MVC application on the cloud using a Web Site? In that case it will have a different domain. This must be configured in the Cross-Origin resource sharing configuration section of the Mobile service.
Deploy the MVC application. If you haven’t deployed an MVC application to the cloud, here’s a step-by-step getting started guide for you - Deploying ASP.NET MVC Web Site on Windows Azure. In the portal, open theAppointmentServ mobile service by double clicking on it. Open the Configure Tab and locate the Cross-Origin resource sharing (cors). Provide the host name. For e.g. as *. azurewebsites.net cloudapp.net:
